
How to Change Classical Guitar Strings
When to Change Strings…
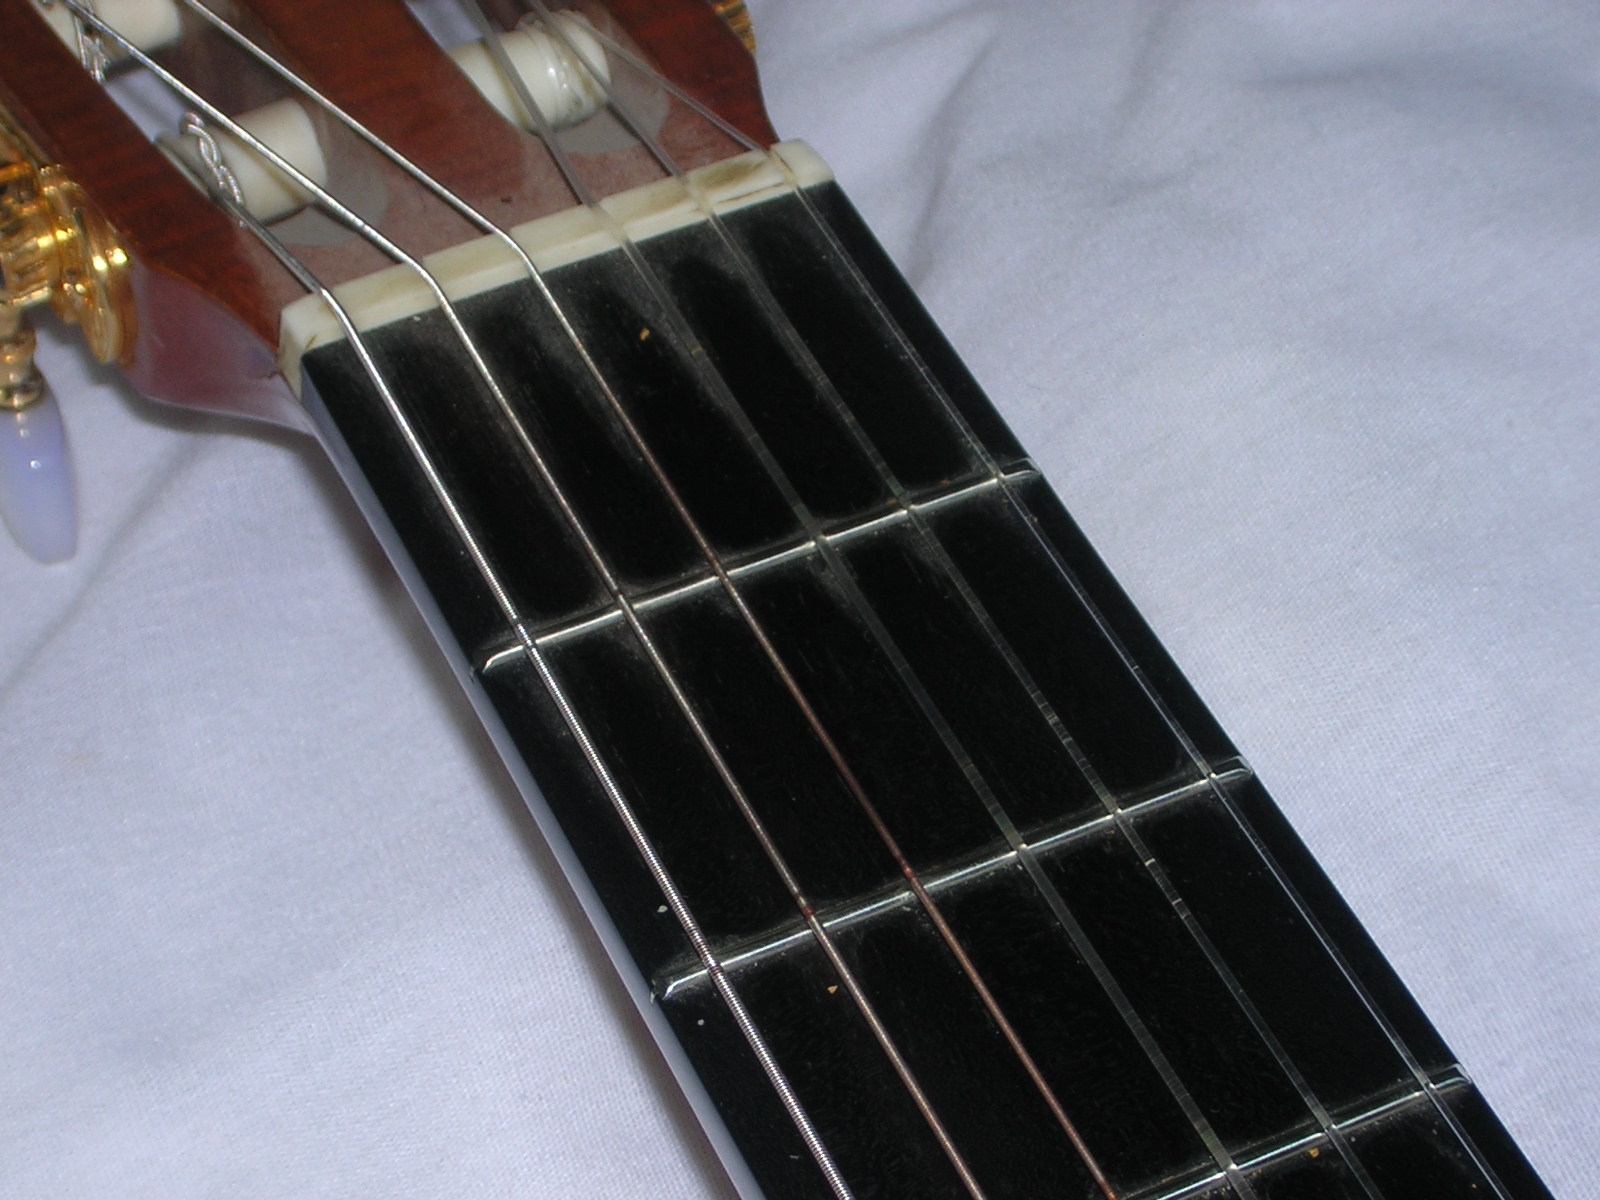
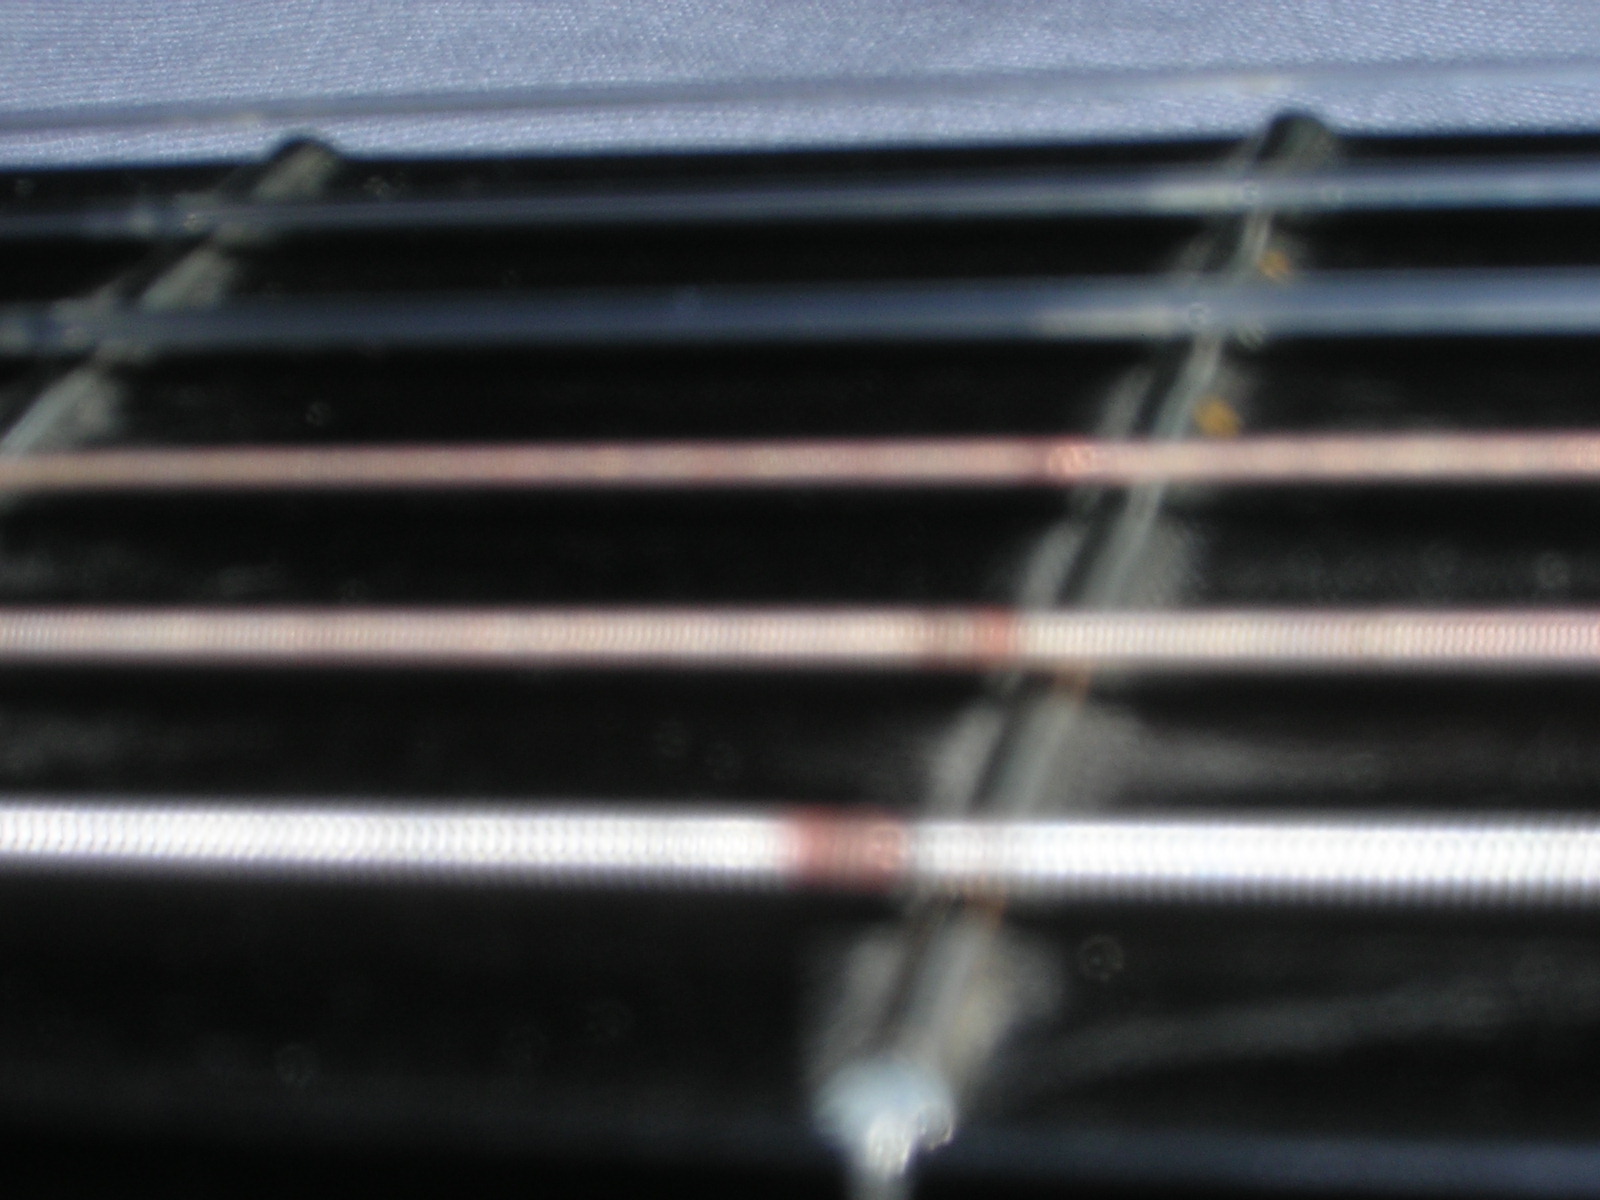
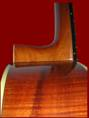
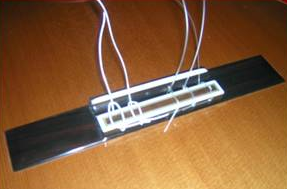
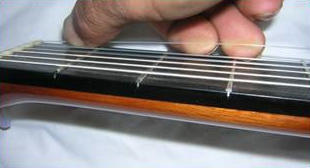
These eight week old strings on this guitar have been played extensively. The wound strings are discolored and are badly worn where they meet the frets. They should have been changed about six weeks ago because they lack the rich tones of newer strings. The life span of strings vary from player to player. A moderate player may go four to six months on a set of strings, while a professional may change them almost daily.
______________________________________
Removing the strings…
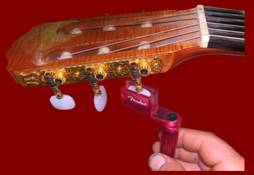
A string winder is used to remove the strings. On this guitar, all of the strings will be removed before the new strings are installed. This will allow access to areas previously inaccessible for easier cleaning. Ancient Myth- The neck is built to compensate tension, and removing the strings will warp it. Actually, a well-made neck will go for months without tension and string up fine. Modern Myth- Releasing the tension will deaden the top. This is a well-played guitar. The top will re-settle faster than the strings will settle (Explained Later).
______________________________________
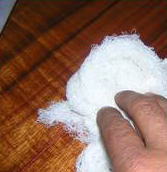
Polishing…

Polish hard-to-reach areas (bridge, bridge to sound hole, headstock…) with a name brand guitar polish and cheese cloth.
______________________________________
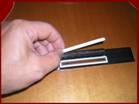
Steel Wooling Frets…
If the frets are dull, mask off the fingerboard & rub the frets lengthwise with OOOO steel. Count your evenly pressured strokes to ensure even fret heights. Frets should shine like chrome with no dents or scratches. (Once you’ve played on highly polished frets, there’s no turning back.)
______________________________________
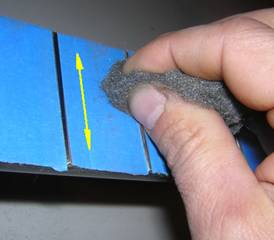
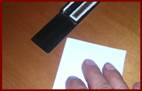
Polishing the Frets
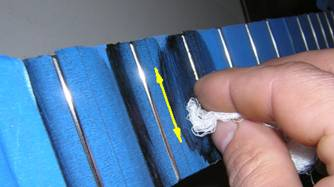
A rubbing compound is used to polish the frets with even pressured counted stokes in the direction as shown. Do not let the rubbing compound rest on a guitar finish. It is petroleum-based and if left unattended for an extended time will leave blemishes.
______________________________________
Cleaning the Fingerboard…
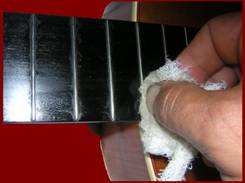
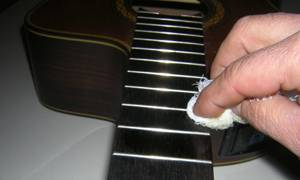
Remove tape. If the fingerboard appears dry, apply boiled linseed oil and wipe dry with new cheese cloth. Boiled linseed oil will also soften grime on the fingerboard for easier removal. Oiling the fingerboard about once a year will prevent cracking from dryness. Otherwise, rub down with clean, dry cheese cloth. (No polish is necessary)
______________________________________
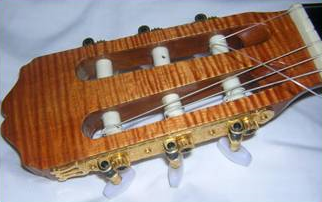
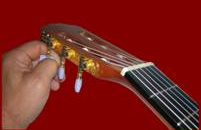
Inspecting the Tuners…

Tuner mounting plates should be flat to the headstock, gears show no wear & rollers are without cracks.
______________________________________
Inspecting the Fingerboard Nut…
Fingerboard nut should be well shaped with no visible cracks or burrs. On some guitars the nut is held by only it’s string tension. If you prefer it glued, use a tiny amount of Titebond glue to allow for easy removal later.
______________________________________
Inspecting the Frets…

Frets should be highly polished with no visible string wear. Fret ends are tight to the fingerboard.
______________________________________
Inspecting the Neck Joint…
Make sure there is no separation between the neck & the body.
______________________________________
Inspecting the Body…

Body should bare no open cracks.
______________________________________
Inspecting the Bridge Saddle…
Bridge saddle is smooth with no visible cracks.
______________________________________
Inspecting the Bridge to Top…
Bridge is well attached to the body. A thin piece of paper will reveal loose areas.
______________________________________
Inspecting the Braces…
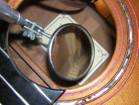
Inspect braces with a mirror. (It is sometimes easier to find loose braces when the top is still under full tension.)
______________________________________
The Strings…

Strings are individually wrapped and labeled for easy identification.
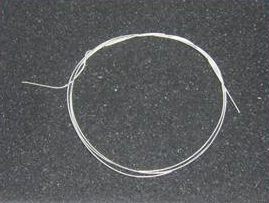
Be careful when uncoiling. A kink will damage the strings.
______________________________________
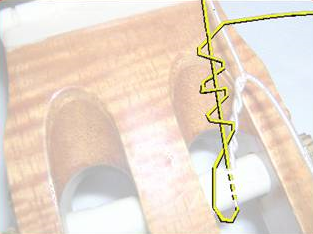
Installing the High E String…
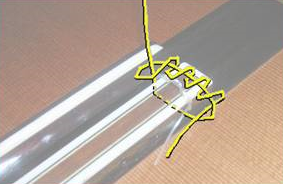
High E string runs through the bridge and wraps on itself four times.

The first three wraps are on top of the bridge,
and the last wrap is located behind the bridge.
Notice that the string end goes beyond the second string hole.
______________________________________
Installing the B String…
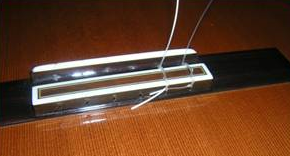
Procedure is repeated with two wraps on top of the bridge,
and one wrap behind the bridge.
Notice the second string also grabs the first string,
and that the second string end goes beyond the third string hole.
______________________________________
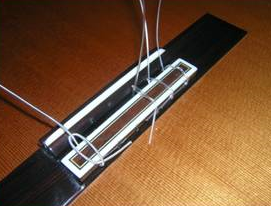
Installing the G String…

Procedure is repeated with one wrap on top of the bridge,
and one wrap behind the bridge.
Notice the third string also grabs the second string,
and that the third string end goes beyond the fourth string hole.
______________________________________
Installing the Low E String…
Procedure is reversed with one wrap behind the bridge,
and the sixth string end goes beyond the fifth string hole.
______________________________________
Installing the A String…
Procedure is repeated with one wrap behind the bridge.
Notice the fifth string also grabs the sixth string,
and that the fifth string end goes beyond the fourth string hole.
______________________________________
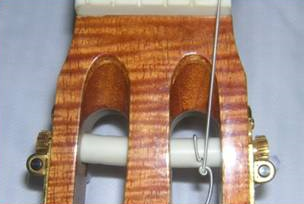
Installing the D String…

Procedure is repeated with one wrap behind the bridge.
Notice the fourth string also grabs the fifth string & the third string.
The fourth string is tucked under the third string at the back of the bridge.
______________________________________
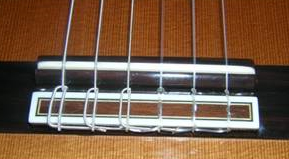
View with full tension. This method of attaching the strings to the bridge not only looks good and holds the strings tighter, but also prevents the string ends from rattling on the top.
______________________________________
Uncoiling Strings…
Strings are lightly pulled to remove remaining string coiling…
______________________________________
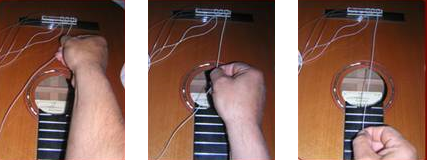
Installing Bass Strings to Tuners…
String is threaded through tuner roller,
with waste side extending on top of the headstock.
While pulling string to moderate tension,
waste end is wrapped around playing side about four times.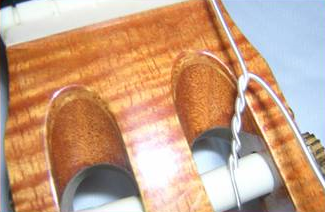
Wraps are uniform with no slack.
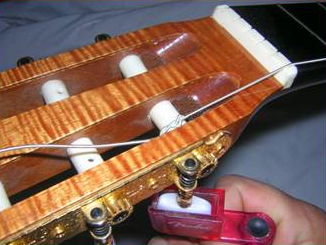
Tension is increased until fourth wrap has reached roller.
This string is about one-half roller turn away from full pitch. At this point, waste area of string is trimmed.
______________________________________
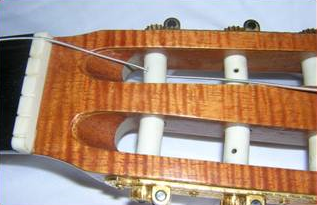
Installing Treble Strings to Tuners…
Procedure is repeated,
except waste end of string is wrapped six times instead of four.
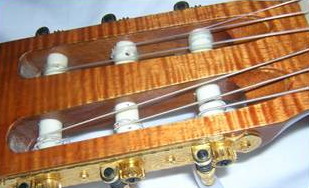
Notice the winding on rollers is in the direction of corresponding tuner knobs.
(Bass strings wind to the bottom of the picture, Treble strings wind to the top.)
This will allow the strings to travel from the fingerboard nut
to the rollers without touching the headstock.
This method of attaching strings to the tuners is extremely effective in preventing string slippage. It also reduces the massive settling of tensions found when players over-wrap their tuners, which would result in more stretching and tuning.
______________________________________
Tune the guitar…
Tune to pitch. There are many ways to tune a guitar. Some are better than others. The Classical Guitar is a compromised instrument. It is designed for the best possible tuning of the twelfth fret to its open string. All notes fretted in between may be either slightly sharp or slightly flat to their desired pitch. This allows all the strings to share the same fret. Without this compromise, the frets would be divided into as many as six individual parts, which would create a whole new set of problems less relevant to the subject at hand.
Tune strings with moderate even strokes in playing position. Weight of attack can affect tuning. Due to the gravity on its neck, a guitar tuned while lying flat on a table will drift flat when brought to playing position.
Methods of tuning…
A few methods of tuning a guitar are:
Electronic tuner: Good in noisy conditions. Pickup some times necessary. Adequate tuning.
Using Harmonics: Generally at the fifth and seventh frets. Easier to hear pitches of two different strings. Looks professional. Adequate tuning, but sometimes requires tweaking for certain keys and/or nut height and string height.
Octaves: In first position. End result reveals that a fret shared by six strings is a compromise. Fair tuning. Needs tweaking to complete tuning.
Fifth/fourth fret to open string: Best compensates for fret position, nut height and string height. Looks less professional, but generally achieves the best results.
All methods should be referenced to A 440.
______________________________________
Stretching the strings…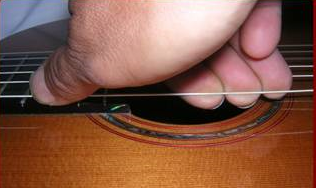
Use Light pressure of thumb and fingers while sliding up and down the strings.
(Aggressive pressure can damage the strings).
….the entire length of the string….
______________________________________
Tune again….
A collector views a virtuoso’s guitar as top dollar because of its pedigree,
while an experienced player knows it’s littered with sweet spots.
It is important to consistently keep your guitar tuned to concert pitch (A 440). Anyone who has owned a new instrument will attest that it requires a breaking-in period to improve its tone. A small amount is attributed to the aging of the wood, but the greatest single event contributing to improved tone of an instrument as it ages is its ability to learn to vibrate at frequencies that will most often be used. The classical guitar consists of approximately 40 major wooden parts, all glued together to hold their idle state. If the instrument vibrates regularly at set frequencies, these glue joints will open in such a way that the top, back and sides will eventually begin to vibrate more freely with notable improvements in tone, response, dynamic range, and volume (Sweet Spots).
An average break-in time for a new guitar can take one to two years. For a professional, one to two months with huge improvements in weeks! A novice guitarist can experience this phenomenon. Play something in the key of C with non-open strings, then play the same in Cb (one fret lowered). Notice a drop in tone, sustain, dynamics, and volume on some of these notes. This occurs because the frequencies have dropped out of the sweet spots of the top, back and sides. The more these notes are used the smaller the drop.
Another example can be seen when restringing a well-kept guitar. When bringing the open strings to pitch, notice as the pitch is reached the volume increases with improved sustain. This will occur more notably on the E, A and D strings. This phenomena best occurs when the guitar is regularly tuned to concert pitch. Dropped tuning is OK because you’re leaving from one sweet spot to another.
A misconception can also be attributed to this phenomenon. Many performers believe that removing all of the strings at one time will somehow temporarily deaden the top. What actually occurs with newly installed strings is a massive settling of tensions between the bridge, saddle, playing area, fingerboard nut, and tuners. String settling is often referred to as stretching. When the strings are installed and tuned they will immediately move flat and drift out of their sweet spots causing a slightly muted effect to the guitar. With repeated tunings, stretching decreases and the top appears to come back to life.
______________________________________
Final Polish…
______________________________________
Final thoughts…
Although only one brand of strings was mentioned, no attempt is made to promote one over another. Choices of brands, alloys, tensions, tonality, durability, and feel can vary as much as the make and models of guitars themselves. An increase of silver in a string may improve tone, but shorten durability. Scale length, string height, style of attack, or even hardness of frets can alter ones views of strings.
Lastly, never to be overlooked, a choice of strings may be decided by the music itself. High tension strings might be chosen to perform Morning (by Grieg) because of its/their dynamic range, while low tension strings may be more suited for Prelude in G Minor (by Rachmaninoff) to achieve a driving, raw, and gritty sound and ease left hand fingerings.
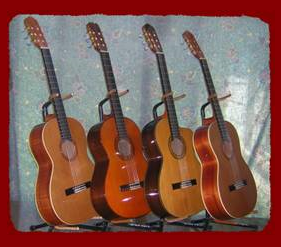
These guitars are all strung with
different strings,
different fingerboard nut heights,
and
different saddle heights,
for different playing purposes because…..

Life is full of different circumstances.